Ok, I kind of lied. This isn't a traditional cheesecake. Wait, don't go! It's just as delicious and a lot easier on the waistline. And it's foolproof to make. Doesn't that sound good? Here's how to do it.
I'm not sure if you can see in the bottom right hand corner of the recipe, but my sister Jill wrote "Chill, not you, the cake".
1 7oz package of chocolate wafers or crumbs
1/2 Cup margarine, melted
1 8oz package of cream cheese (I use light)
1 Cup icing sugar
2 packages/envelopes of Dream Whip, prepared
1 can crushed pineapple
This first time I made this recipe I had no clue what Dream Whip was or the cookie crumbs. Here's what you want to look for when you go shopping.
If you bought wafers, crush them with a rolling pin or any other method you like. I always buy the crumbs! Makes life easier.
Anywho, once you've got the crumbs mix about 2 cups with the 1/2 cup melted margarine. This will create your crust and topping. Evently press the wet crumb mixture into the bottom of your favourite dish. I usually use a 9 x 12 glass baking dish. If you want a thicker/deeper piece of cake I would recommend using a 9 x 9 pan. Try to reserve some crumbs, about 1/4 cup...you'll see why.
Next prepare the filling. As mentioned in the ingredients list, you do need to prepare the 2 envelopes of Dream Whip as according to the package directions.
Which means combine milk, vanilla extract and the Dream Whipe envelopes in a large bowl and mix on the highest setting until peaks form, 5-7 minutes.
Mmmmmm. Once that's done add in the softened cream cheese, icing sugar and crushed pineapple. No need to drain the pineapple, dump the whole can in!
Stir until well mixed. Depening on how soft your cream cheese is you may notice some chunks ( I mean that in the best possible way) of cream cheese. That's totally ok. Don't stress.
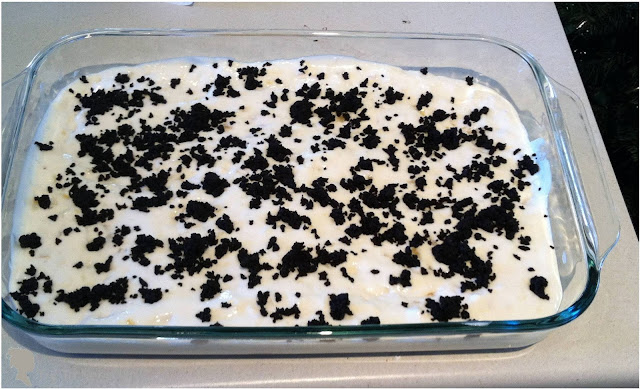
Then pour it over your chocolate crumb crust!
Feel free to use a spatula to ensure it's evenly spread out.
Feel free to use a spatula to ensure it's evenly spread out.
Almost done. To finish it off, sprinkle the remaining wafer crumbs over the top.
Perfect. Put this bad boy in the freezer for 2-24 hours. I always make it the night before. Just make sure to take it out for 10-15 minutes before serving it, or else you'll have a heck of a time trying to cut nice pieces!
Not to toot my own horn, but my friends drool over this cake. I often make it for birthdays (including mine) but it's easy enough to throw together anytime.
I promise you will not be dissapointed!
I promise you will not be dissapointed!


2 comments:
Looks yummy! I think it will be great for this summer when we need a cool dessert!
Alyzabeth's Mommy
If you don't want to have to freeze it, drain the pineapple really well. If you don't it'll be soupy. :) Yum! You should make this for my birthday! :P
Post a Comment